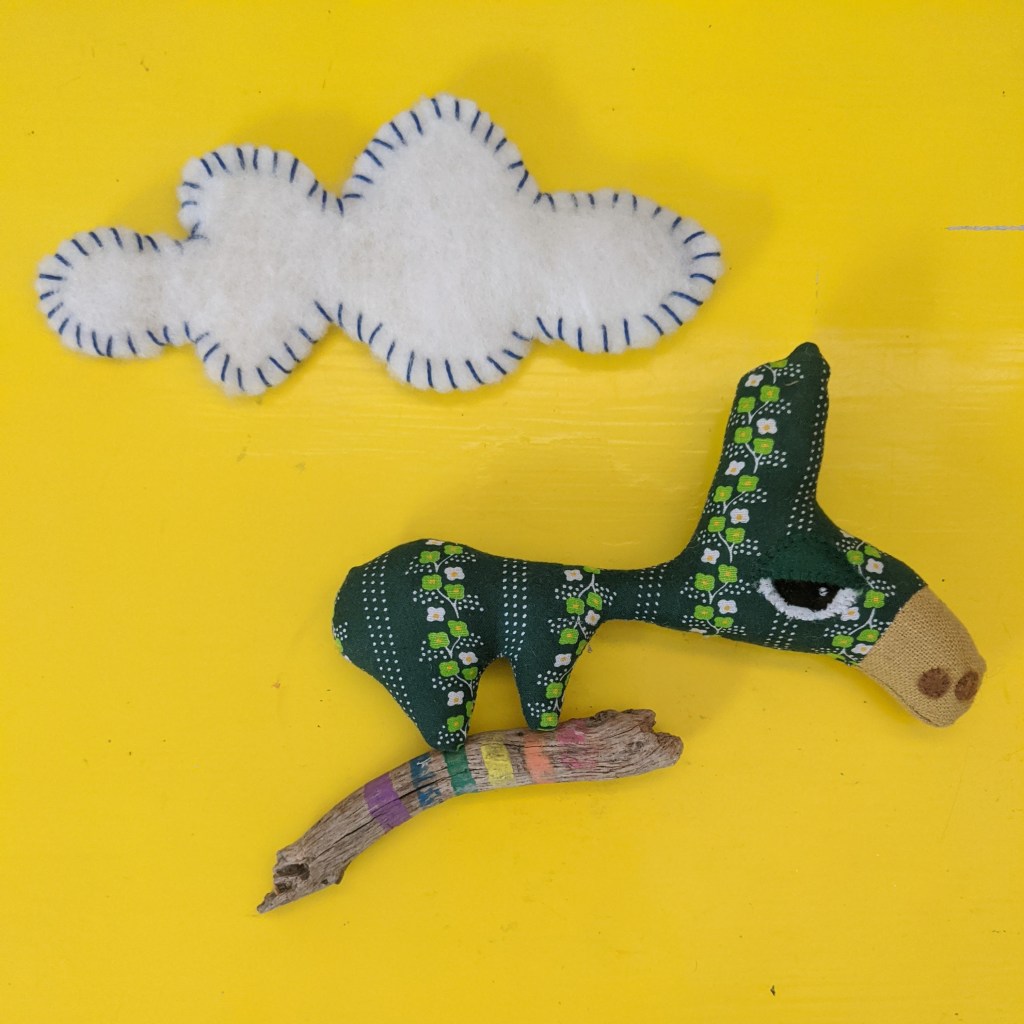
Long ago, I doodled this little burro who later made his way into a mini series of textile artworks and then became a soft sculpture. I thought I’d offer the pattern to anyone who might enjoy stitching one up. Grab yours here.

Tools + Materials:
- pattern printout
- scissors
- pins
- fabric (woven fabrics work best for the body, felt and other fabrics can be used for details)
- hand sewing needle
- thread
- iron
- stuffing
- stuffing stick (a wooden chopstick or pencil will do)
- freezer paper (optional)*
- sewing machine (optional)
Steps:
1. Prepare your pattern pieces. Either cut them directly from your printed pattern page (OR) trace them onto freezer paper and cut them out.
*Freezer paper can be ironed onto fabric, making it easier to cut out tiny parts. Alternatively, small pattern pieces can be traced directly onto fabric.

2. Pin, iron or trace the body pattern piece onto your fabric and cut 2, a front and back. If using the same fabric for the front and back, you can cut on a fold to get both pieces at once. If cutting pieces separately, be sure to flip the pattern piece over before cutting the back (as shown below)

3. Repeat step 2 for the nose, again making sure you have a front and a back. For this step, I cut on a fold.

4. Trace two of each eye piece and one pair of nostrils onto different fabrics. I used cotton for the eyelid, black and white felt for the eye and eyeball and tan felt for the nostrils.

Time to sew!

5. With right sides together, pin the front nose to the front body aligning the top corners* and stitch at 1/4″ using a back-stitch or a sewing machine. Repeat for the back. Iron seams flat.
*Note that the nose piece will hang over the end slightly when pinned, but will fit correctly once stitched at 1/4″ and opened.

6. Stitch the nostrils to the nose on the front body using a whip stitch. Continue with the white of the eye, then layer on the eyeball and then the eyelid. A little white thread can be used to stitch the speck in the eyeball, if desired, by placing 5-6 stitches close together.

7. With right sides together, stitch the front and back body using a back-stitch by hand or sewing machine. Leave an opening for stuffing as marked on the pattern.

8. Clip a small triangle out of the seam allowance on the under-body to help the seam lay flat once turned and turn right side out using your chopstick or the end of your pencil to help push small parts through.

9. Using small pieces of stuffing and your stuffing stick, fill the body, ear, and head and until firmly packed. To get a nice firm neck, roll a piece of stuffing against a fabric surface (like your pant leg) to make a little log and insert it, adding small bits to finish it off if needed. Stitch the opening closed using a ladder stitch.

Now marvel at the rascally little creature you just created and if you’re feeling share-y use the hashtag #littlestreamstudiopatterns so I can see what you’ve made!
